Do it yourself......for free!
I love to create things. From the moment I started blogging I knew I would have to find a way to create a header that fit me and my personal style. Of course, I looked all over the place for backgrounds and headers, hoping that one would stand out above all the rest. I saw so many that I loved and even used a couple at first....then I found Scrapblog...and I knew right away, that my new header was soon to be displayed!
I feel that I must warn you....once you begin creating in Scrapblog...you may spend hours and hours playing and editing and adding and creating, to the point that your family doesn't even miss you anymore. They just assume that you are on that computer....again!
I must also tell you that up to this point, everything I have done in Scrapblog has been free. There are several kits and backgrounds etc... that I would love to use...that are not free, however they are very reasonably priced and I do plan to purchase kits in the future for sure.
The examples that I show and the tutorial example were created using the free kits.
For my header, I decided on one without photos.
You will see that you can easily add photos to your header in Scrapblog. The possibilities are endless.
These are 2 of the headers I have made using Scrapblog.
I plan to change them with the seasons, while keeping the same header style.
I plan to change them with the seasons, while keeping the same header style.
And this is the example header that I will show you how to make!
First, you will need to go to http://www.scrapblog.com/ and create an account.
Once you have signed in you can watch a little video tutorial on how their website works.
To begin making your header, click on Start from Scratch.
It will take
Then choose to use Quickmix.
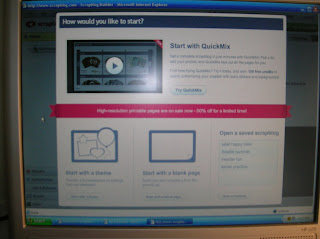
You will then select a kit.
For this example, I chose the travelogue kit. It is free. Most are not.
Even though you will not be adding a photo (for this example) you still need to upload at least one to use Quickmix. *Go ahead and upload a few to see how cute a Scrapblog book is...you will want to come back and make many of those too!*
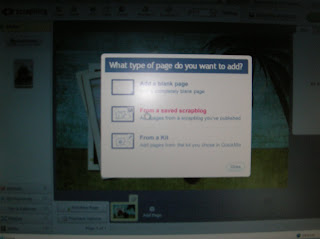
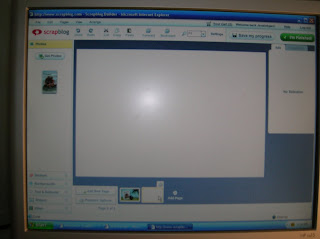
After you have seen how cute the book is...you will need to add a page....a blank page.
Now this is your canvas to work on your new header.
Keep in mind that a normal size banner header is rectangular...not 4x6 like a picture. For that reason, only use the top portion of the page to create your banner header. (You will crop off the bottom later.)
Start with a shape.
I use this one....I drag it over and then I stretch it out.
Then I fill in the shape with a color or a background paper. I chose the blue. Just drag it over into the shape.
Then, go get some stickers. I chose the flip flops and the palm tree. When you drag them over, they are huge. Just shrink them down and place them where you like them.
Then you can add the text.
Drag the text box over. Type your text. Stretch out the box, increase the font size to 72, then play with the fonts. I chose Broadway. Then change the color to white.
When you are finished, drag the text box onto the shape.
Then for the quote underneath, add another text box and repeat the process...until you have the size, color, and font that you like. Be creative. You will love it.
Soon you will have a header like mine.
Now this is where it gets a little tricky for me.
When you are all done...click on I'm finished. It will ask you what you would like to do. Click on share...and choose to see the options.
UPDATE:
This is where things are different now (May 2011)
After you create your header...just click on the little tool sign above the page at the bottom in your scrapblog book. It will allow you to save to your computer right there without going to Photobucket.
Then just crop it in Picassa and save it again.
You may choose whatever photo editing website you like. I use Photobucket and Picassa. Once you get the header over there, you will need to crop it so the bottom half of the picture (where all the white is) is gone.
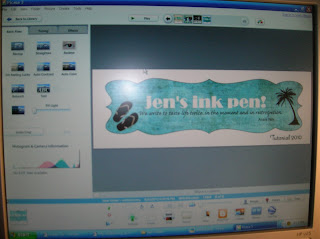
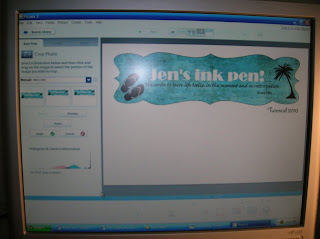 That new edited picture is the one that you want to save in a folder on your computer to use as the image for your header.
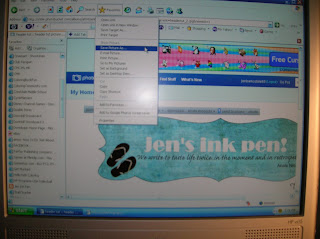
Then skip down to here from the UPDATE!
Then, just go into your blogger layout and choose header. Choose the image from the folder on your computer and be sure to say use instead of title and description.
You should see the image....then SAVE....say a little prayer (I always do) and go check out your new header.
I have not written a tutorial before....and this one was written with the assumption that there was some prior Blogger knowledge of headers in general. (mainly because the people who asked me to write this have customized headers, rather than the default headers.)
If you have any specific questions, please ask in the comments and I can elaborate on something if needed.
And remember, the possibilities are endless. You may come up with something completely different...like the first header I made, also in Scrapblog.
See what I mean. You can add pictures, borders, frames and all kinds of goodies depending on the kit that you choose to use.
It was cute...I never really loved it...and I wanted something different.
If you make a new header using Scrapblog, please come back and leave me a comment with a link. I would love to see what you come up with!
Have fun!




Wow Jen! Your tutorial looks GREAT!!! I can't wait to try it out! You make it sound and look so easy...we'll see about that! I can't wait to try it out! Unfortunately we have an appointment this morning or I would get started on this right now!
ReplyDeleteThanks so much for taking the time to teach us how to do this....maybe my header will soon look cool like yours! :)
Great idea! I'm a new follower from Trendy Treehouse! I look forward to reading more from you! Stop by and visit!
ReplyDeleteDawn
http://www.thewayiseethings.typepad.com
I am so going to try this SOON!!! Thanks for letting us know how it's done!
ReplyDeletefound you on new friend friday!
ReplyDeletethis tutorial is awesome! i am so using it when i am ready for a header change!
thanks :)
Thanks for the tutorial. I just wasted about 30 minutes in paint making an ugly header, so I can't wait to head over to scrapblog and make a cute one!
ReplyDeleteLove your blog!
Thanks for the advice. . .love your look with the flip/flops and palm tree! Can't wait to have some spare time to try it out. . .
ReplyDeleteWow. Thanks for sharing. I really want to learn to redo my header and blogs. Great job on yours.
ReplyDeleteHey Jen, thank you so much for sharing this tutorial. I'm totally going to have to give it a try!
ReplyDeleteHey Jen- I made my new header and I uploaded it to Photobucket. I tried to then get it to Picasa where my other pictures are so I could crop it...but I can't get it there! I tried many ways...I didn't see an "option" in Scrapblog for it? Any ideas? Not sure what I am doing wrong.
ReplyDeleteI thoroughly loved scrapblog! So FUN!!! I could sit there (and did!) for many hours making headers!
Hey Kerri! I said this part was tricky...let me see. Try clicking on the page image (in Photobucket) to make it the larger size. Then save as to a file on your computer. Then take it from your computer to Picassa to crop. Try that and see. Let me know! I'm glad you liked Scrapblog!
ReplyDeleteWow! How fun, I might have to try that later:) Yes, my family always thinks I am on the computer. come enter my giveaways since you are a follower!
ReplyDeleteSo adorable! Living along the Gulf Coast, I'm especially lovin' your new header! So reminds me of home just minus the oil mess of course! Your tutorial was great! Thanks for taking so much time to help the rest of us!
ReplyDeleteThanks for sharing this and the link. I might have to try it out!
ReplyDeleteWow!! That is good. It really a very nice article. You explained so well all the necessary information by the screen shots. It help us in smooth working. I love it. I will make my header like you as soon as possible. Thanks for sharing these types of blog.I hope you will share some more interesting blogs in future also.
ReplyDeletedigital signature FAQ